Growing microgreens

Growing microgreens
CAROL J. MICHEL FOR FAMILY HANDYMAN

If you’ve never been served a salad or other dish garnished with microgreens, you may wonder if they are some strange new food. Quite the contrary. They’re the edible seedlings of many of our favourite vegetables, and they’re packed with nutrients – often more than fully mature vegetables!

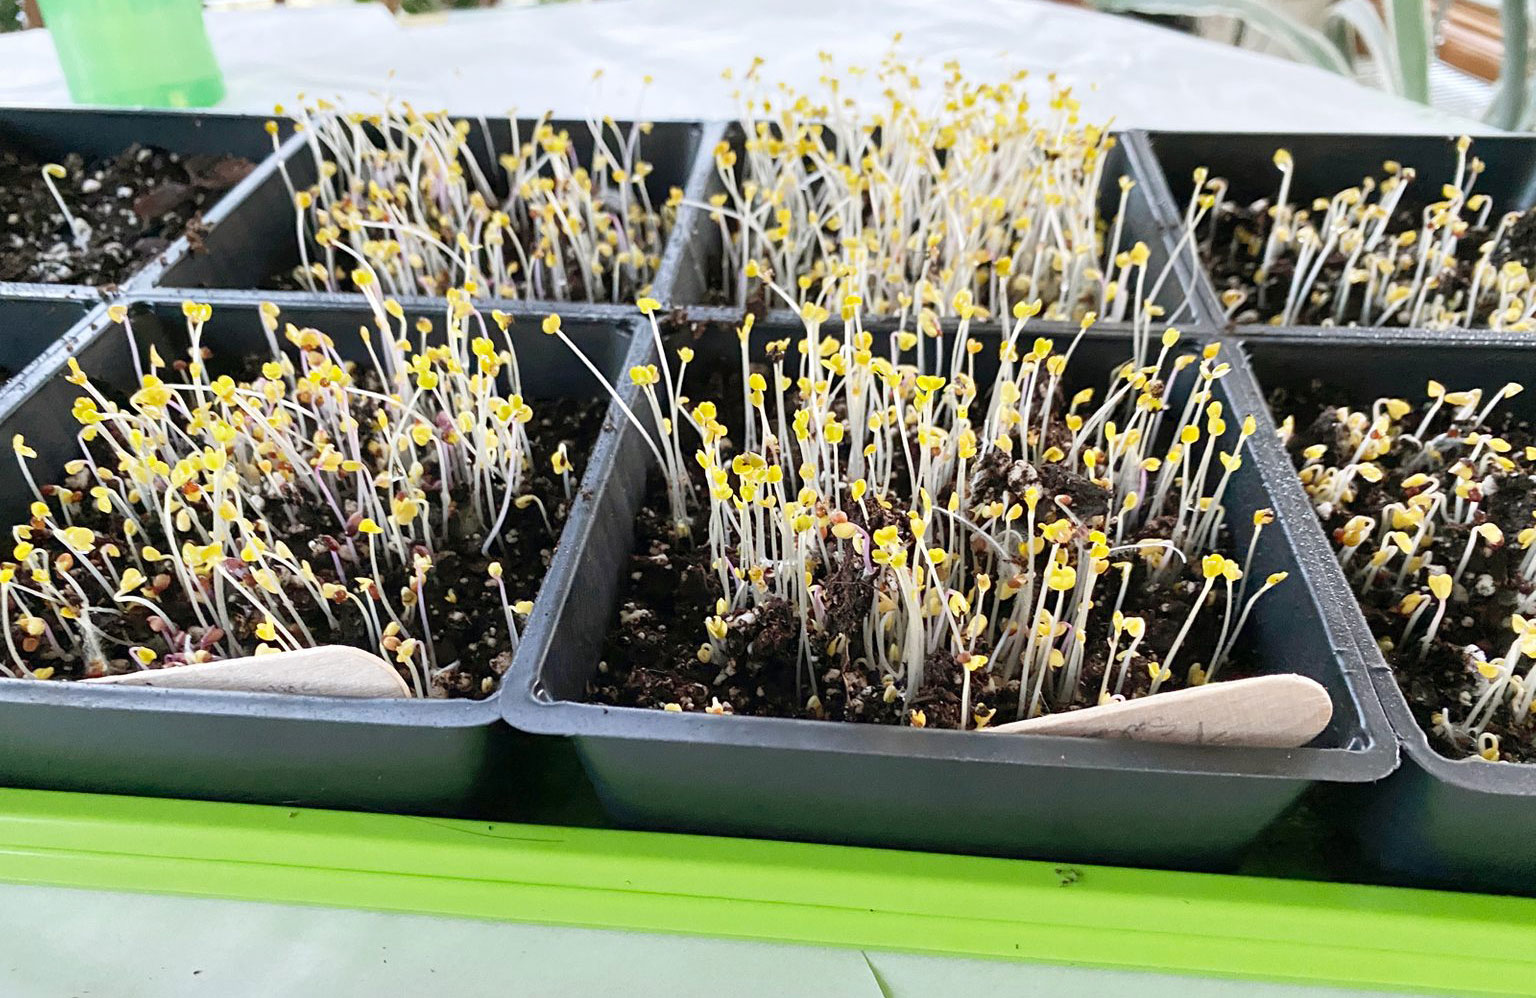
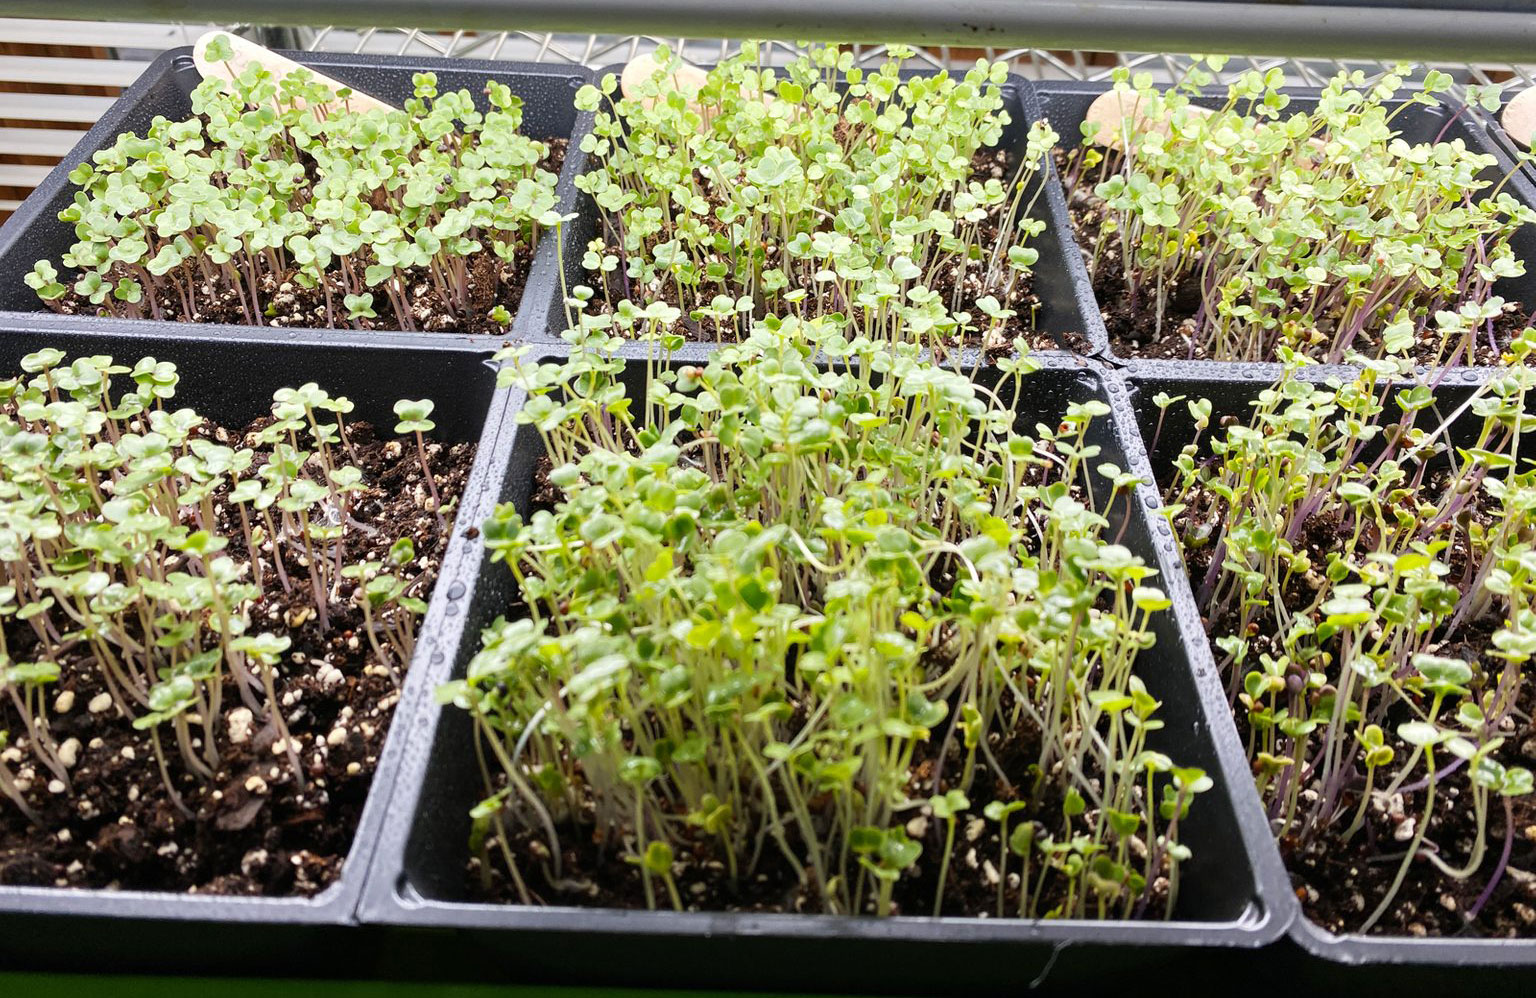
They’re also easy to grow indoors and don’t require a lot of fancy lights or other equipment. You can grow microgreens in various containers under a basic shop light, providing a ready supply to add to salads, sandwiches, or any dish that needs a little garnish.

One caution: Once you start to grow microgreens, you won’t want to stop.

Tools Required

LED shop light or other light source with a timer

Snips or scissors for cutting microgreens

Spray Bottle

Watering can

Materials Required

Covering for containers

Microgreen seeds

Plant labels

Planting container with drainage holes

Potting soil or seed starting mix

Saucer or other tray to place under container

Learn how to build a hydroponic garden in just a few easy steps.

Advertisement

Step 1: Fill containers with soil

Step 1: Fill containers with soil
CAROL J. MICHEL FOR FAMILY HANDYMAN

Wet the potting soil or seed starting mix. Straight out of the bag many will be dry, especially peat-based ones. Pour the soil into a clean bucket or plastic bin and add water.

Give it time to absorb the water. The soil should be moist like a wrung-out sponge.

Containers can be recycled plastic with drainage holes, or you can purchase microgreen containers, including flats with no drainage holes to hold individual inserts with drainage holes.

Fill the container with about an 20-30mm of moist soil.

Tamp down the soil to remove air pockets.

Step 2: Sow microgreen seeds

Step 2: Sow microgreen seeds
CAROL J. MICHEL FOR FAMILY HANDYMAN

Scatter microgreen seeds across the surface of the soil. Don’t worry about spacing; smaller seeds can be fairly close together. Larger seeds, like peas, need more room.

Use seeds labelled specifically to be grown as microgreens. That way you’ll get more seeds in a packet and know those seedlings are edible.

Tamp down the seeds to ensure good contact with the soil.

Add a label to the container with the seed variety written on it.

This is especially helpful if you’re sowing several types of microgreens at the same time.

Cover the seeds lightly with soil, then gently mist with water from a spray bottle.

Discover how to grow your own curry garden.

Step 3: Cover the containers and put in a dark location

Step 3: Cover the containers and put in a dark location
CAROL J. MICHEL FOR FAMILY HANDYMAN

Cover the containers or place in a plastic bag. The cover can be clear or one that blocks light. This keeps the seeds from drying out.

Place your microgreens in a dark location for the first few days where the air temperature is around 21 degrees Celsius.

In the dark, your seedlings will grow taller trying to find the light. That will make them easier to harvest later.

Step 4: Check your microgreens twice a day

Step 4: Check your microgreens twice a day
CAROL J. MICHEL FOR FAMILY HANDYMAN

Lift the cover and check your microgreens twice a day. If the soil appears to be drying out, mist with clean water. Depending on the variety, seeds may begin to germinate within a few days or up to a week.

Once seedlings are about 20-30mm tall, they’re ready to go under lights.

Don’t panic if your seedlings look yellow at this stage. They’ll green up quickly under lights.

This is how to grow fantastic summer herbs.

Step 5: Place growing microgreen seedlings under lights

Step 5: Place growing microgreen seedlings under lights
CAROL J. MICHEL FOR FAMILY HANDYMAN

When seedlings are about 20-30mm tall, remove the cover and place the container under a light. A basic LED shop light will work.

Use a timer to turn lights off and on so microgreens receive 12 to 15 hours of light per day. Or, if you have a really bright north-facing window, grow them with just the daylight from that window.

Water seedlings enough to ensure the soil doesn’t dry out. Be careful not to flatten the seedlings. Water from the side, or place the container in a tray of water so the roots pull it from the bottom.

Step 6: Harvest your microgreens

Step 6: Harvest your microgreens
CAROL J. MICHEL FOR FAMILY HANDYMAN

Harvest once they have healthy green seed leaves, or later when you see the first set of true leaves.

Harvest by cutting them off with clean pruning scissors or kitchen scissors well above the soil line. This way, you avoid mixing soil with the microgreens.

Rinse off the cut microgreens, blot them dry with paper towels and enjoy. They’re best eaten soon after cutting, but can be stored in a refrigerator for a week or two.

Dump the soil out, clean the container and start a new batch of microgreens with fresh potting soil and more seeds.

Fresh potting soil lessens the chance of seedlings being infected with a soil-borne disease called damping off, which kills them. Microgreens won’t grow back once cut off.

Sign up here to have Handyman’s favourite stories straight to your inbox.

Source: Family Handyman