Most walls feature skirting boards at the joint where the wall meets the floor.
Skirting covers gaps, protects the base of the wall and conceals imperfections.
Decorative skirting also enhances the look of a room by breaking up the flat surfaces of walls and floors, in the same way other trims such as dado rails, cornices and architraves do.
When adding skirting to a new wall or in an extension, install boards that match the ones used in the rest of the home to maintain the style.
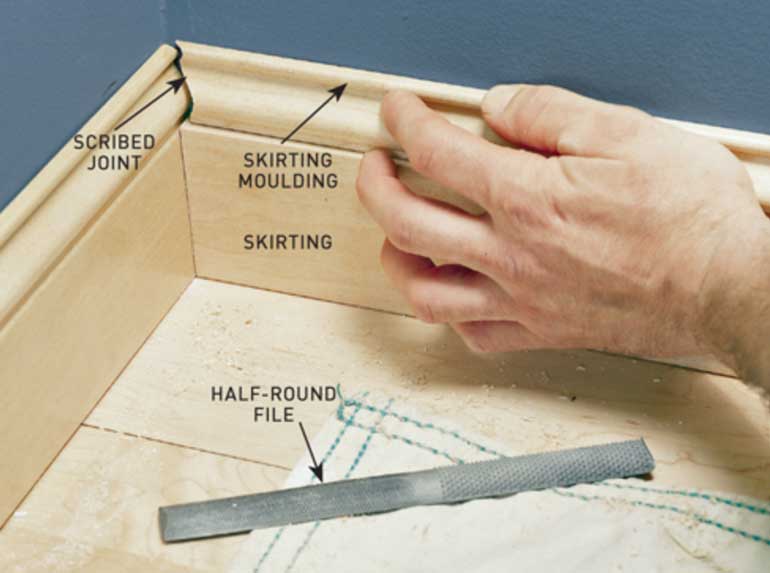
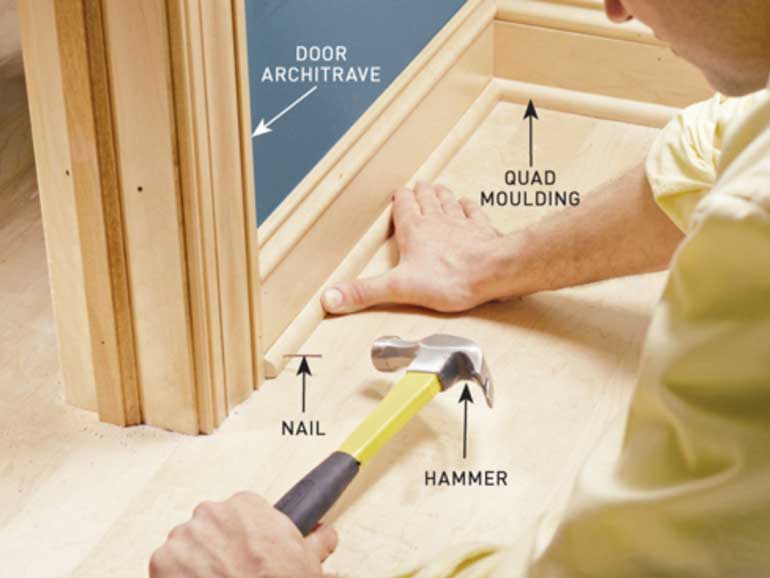
If the standard profiles don’t suit, install rectangular boards, then add skirting and quad moulding to the top and base to make customised trim.
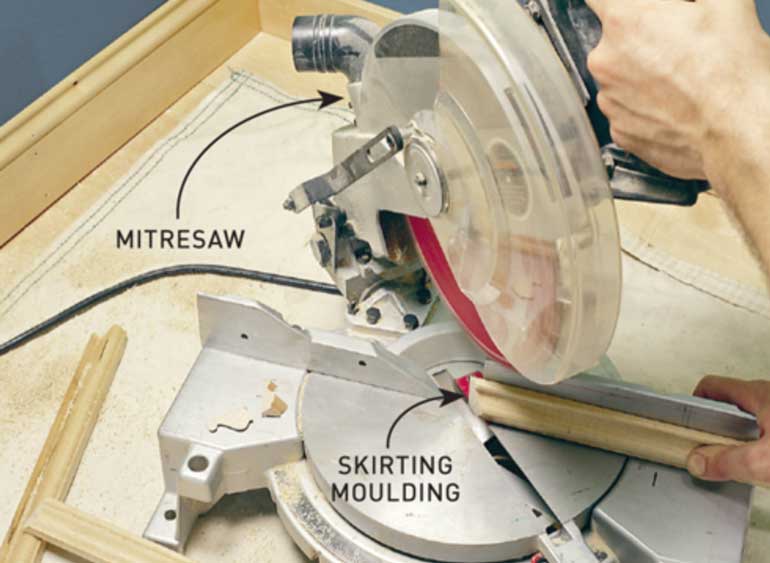
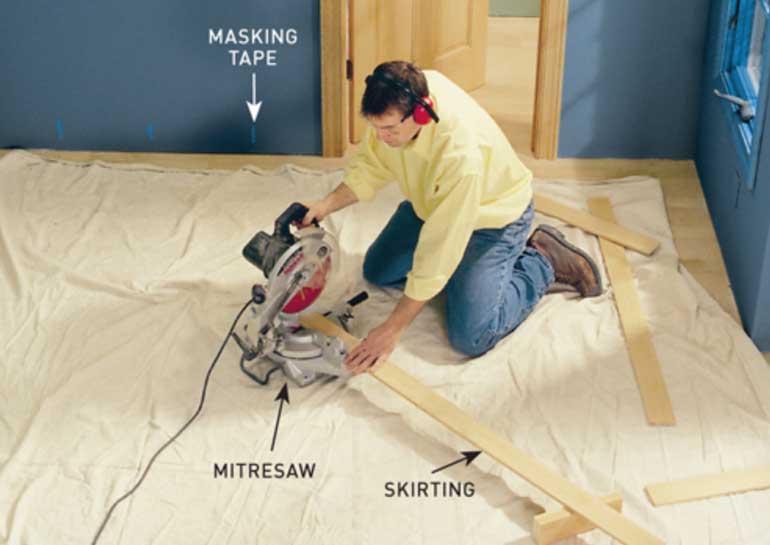
Where the skirting isn’t long enough to cover the entire wall, join two pieces with a scarf joint, cutting the lengths of timber at a 45° angle with a compound mitresaw and joining them with adhesive and nails.
Most trim is made from solid timber like Tassie oak or finger-jointed pine, with primed MDF also available.
The combination of profiles we used here costs about $15 a metre.
If you can’t find or make skirting boards to match the existing ones in your home, moulding specialists can cut them for you, but this can cost up to three times as much.
Preventing dips
Step 1. Cut the skirting
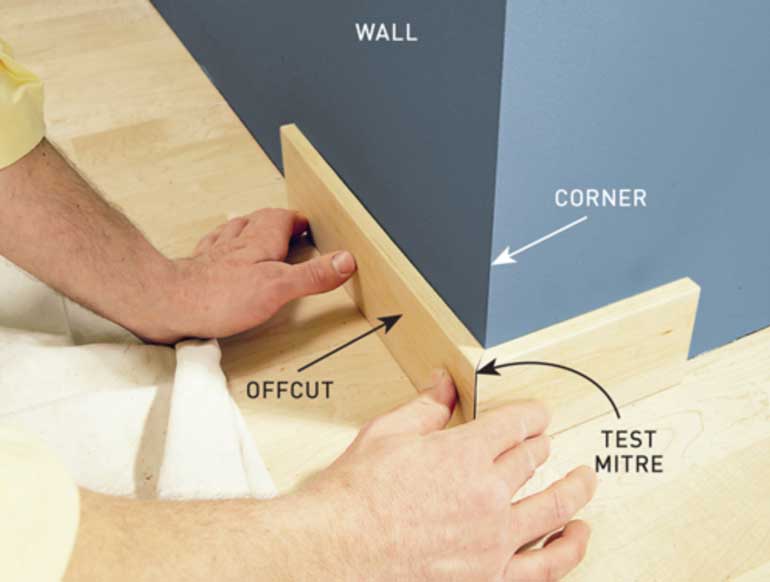
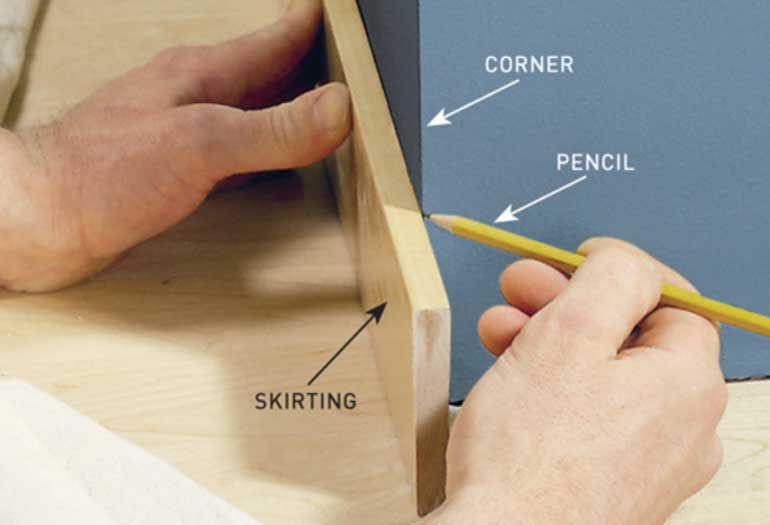
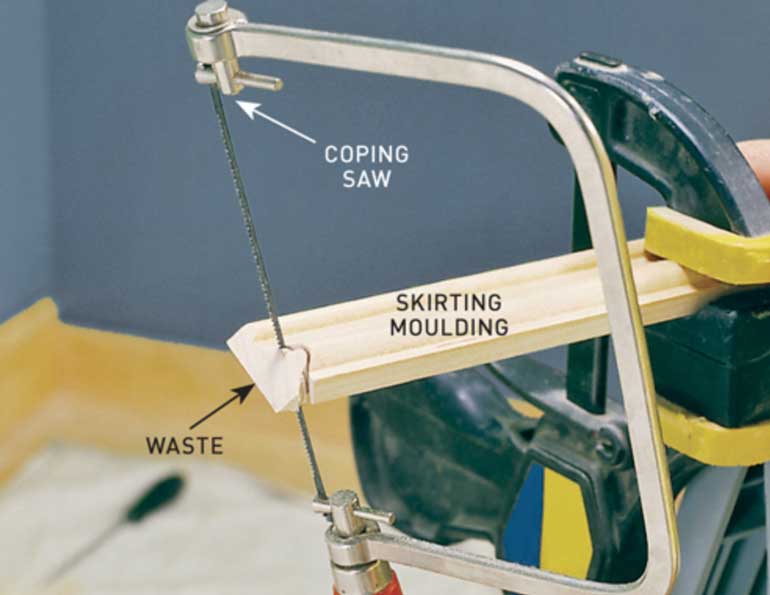
Step 2. Determine the mitre angles