How To Build A Garden Arch
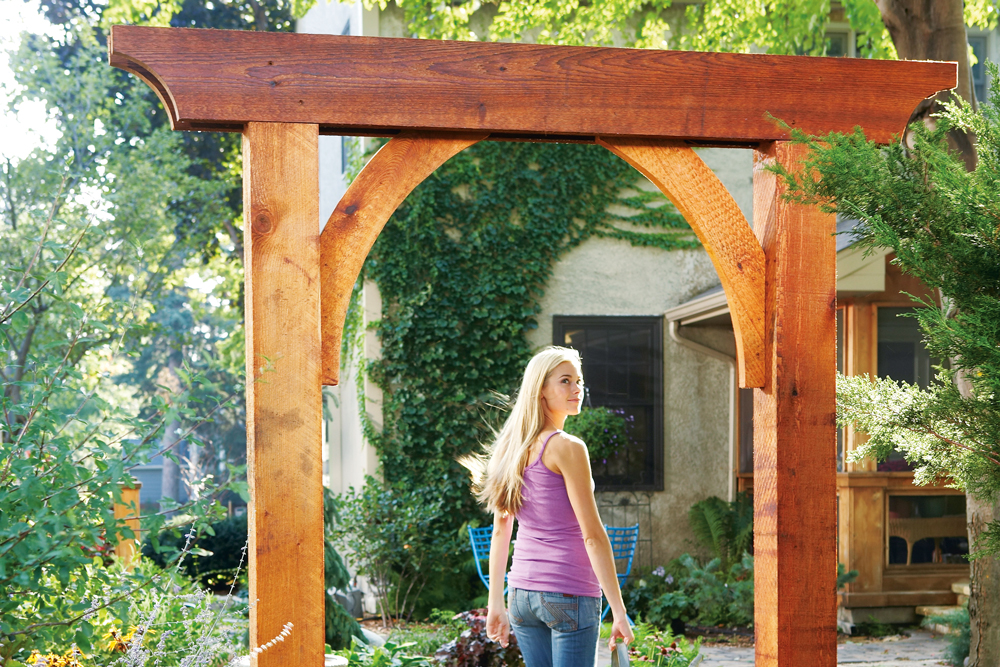
This rough-sawn timber arch has just six parts and can be built in a day using a drill, circular saw and jigsaw.
Simple but versatile, it has many landscape uses, including as a gateway in a fence, an opening in a hedge or
a frame for a paved walkway.
Made of treated pine, the posts are sunk in the ground using quick-set concrete and the timber is finished with a penetrating oil, to deepen the natural pine colour and protect it from weathering.
With the treated pine, fasteners, timber oil and concrete, the total cost for the project comes to about $400.
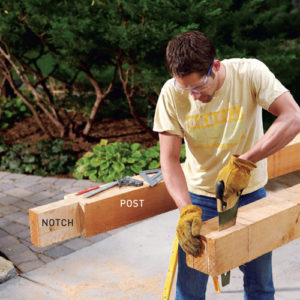
Step 1. Cut the notches
At the top of each treated pine post, make crosscuts for 190 x 45mm notches, using a circular saw set to full depth for the vertical cuts, then finishing with a handsaw. TIP Use a circular saw to cut straight edges and a jigsaw for the curves.
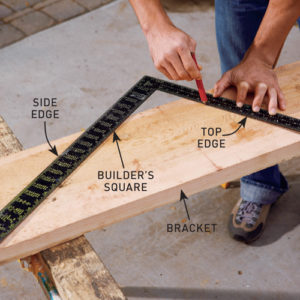
Step 2. Mark up the top pieces
On the two headers, trace around a bucket with a 280mm diameter to mark the curved ends. Set out the top and side edges of the brackets using a builder’s square, then tap a flathead nail into a sawhorse for use as a pivot point when drawing the curves.

Step 3. Cut the brackets
Hook the end of a tape measure over the nail head and use it as a guide to draw the inner arc of each bracket with a 600mm radius. Mark a second arc 735mm from the nail, then cut out the brackets and curves on the headers with a jigsaw and circular saw.
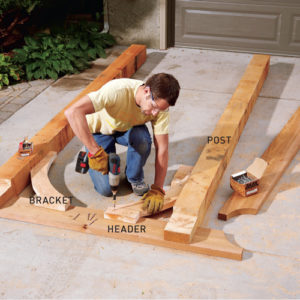
Step 4. Assemble the arch
Drill 3.5mm pilot holes, then use 90mm x 14g screws to secure the posts to a header 300mm from the ends. Attach the brackets to the header with 75mm x 14g screws and to the posts using 90mm screws. Secure the second header with 90mm screws.
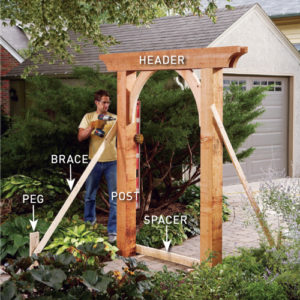
Step 5. Raise the arch
Secure a 90 x 38mm spacer 750mm from the base of the posts. Dig two 250mm holes to 750mm deep, then plumb the posts using a spirit level and brace in position, securing with pegs. Pour in quick-set concrete, removing the spacer and braces when it is cured.
Vote It Up:

Points: 1