Build A Mosaic Tile Table
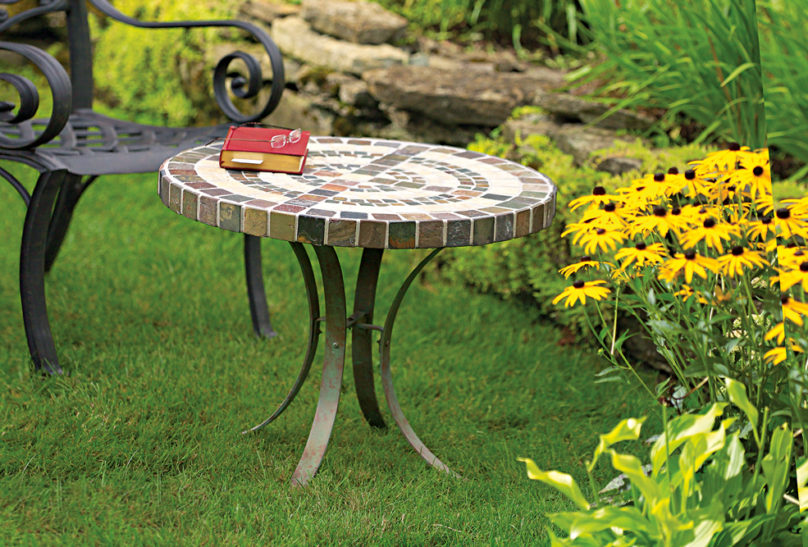
Build a decorative but durable outdoor feature that’s tough enough to weather the elements.
Garden furniture has to be tough if it’s going to withstand a battering from the elements, but often this durability comes at the cost of the item’s decorative value.
This outdoor table is different, as its tiled surface won’t fade from exposure to sunlight, and the strong steel frame is finished with metal paint to prevent it from rusting.
You can build the table using a few basic tools and skills and a simple homemade jig to bend the steel.
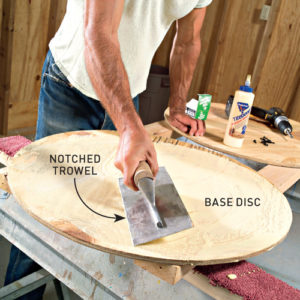
The round tabletop is marked up using a carpenter’s compass or DIY trammel, and has a base of two 12mm thick layers of exterior plywood laminated together.
The plywood is topped with a layer of 6mm thick fibre cement (FC) Hardiflex cladding suitable for exterior use, then waterproofing membrane is applied and covered with mosaic tiles.
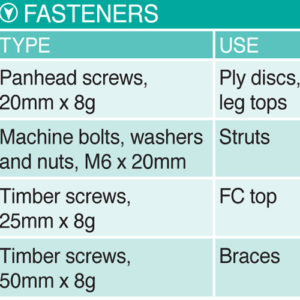
The leg base is made from sturdy 40 x 6mm and 20 x 3mm mild steel flat bar. The legs are bent by hand and bolted together, then secured to the top using screws, with pine braces for support.
Sand the leg assembly using 180 grit abrasive paper, then clean the steel and apply primer.
Finish with two coats of a metal paint such as White Knight Rust Guard Epoxy Enamel.
Tiling the tabletop
For the top, we used tiles in three different sizes to neatly fill out the curves without having to cut the tiles into wedge shapes. The largest tiles were used on the edge so they enclosed the top tiles, giving a neat finish.
Once the adhesive has cured, mix up a sand-and-cement based exterior grout.
Use a squeegee to work it into the gaps between the tiles, leave to dry for 20 minutes, then wipe off the excess with a sponge.
Polish off the haze using a cloth dipped in a solution of water and white vinegar.
Make a bending jig
To make curves in mild steel, make a jig from a 900 x 450mm sheet of 19mm plywood and two 220 x 90 x 45mm timber blocks with rounded ends.
Secure the timber blocks to the plywood with an 8mm gap in between, using adhesive and 50mm x 8g screws driven through the ply.
Mark the midpoint of each rounded end on the blocks, then temporarily secure the plywood base to the workbench with 50mm x 8g screws.
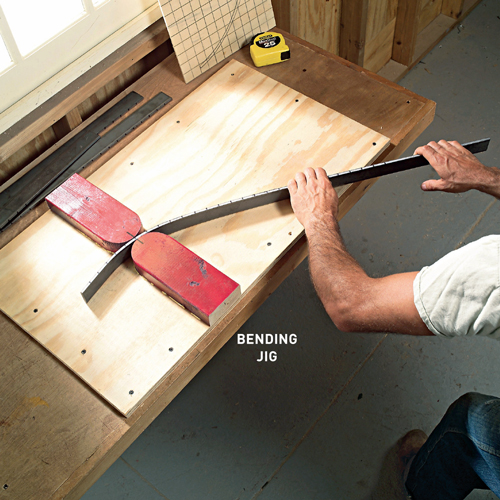
To create curves in mild steel make a bending jig
Diagram
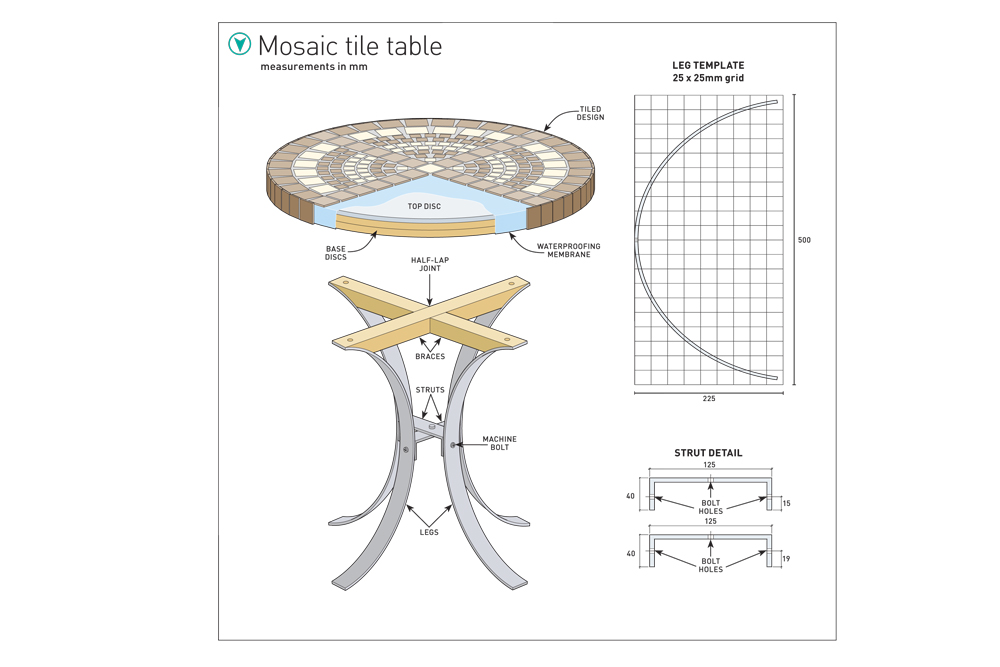
Follow the diagram and templates to build the mosaic tile table