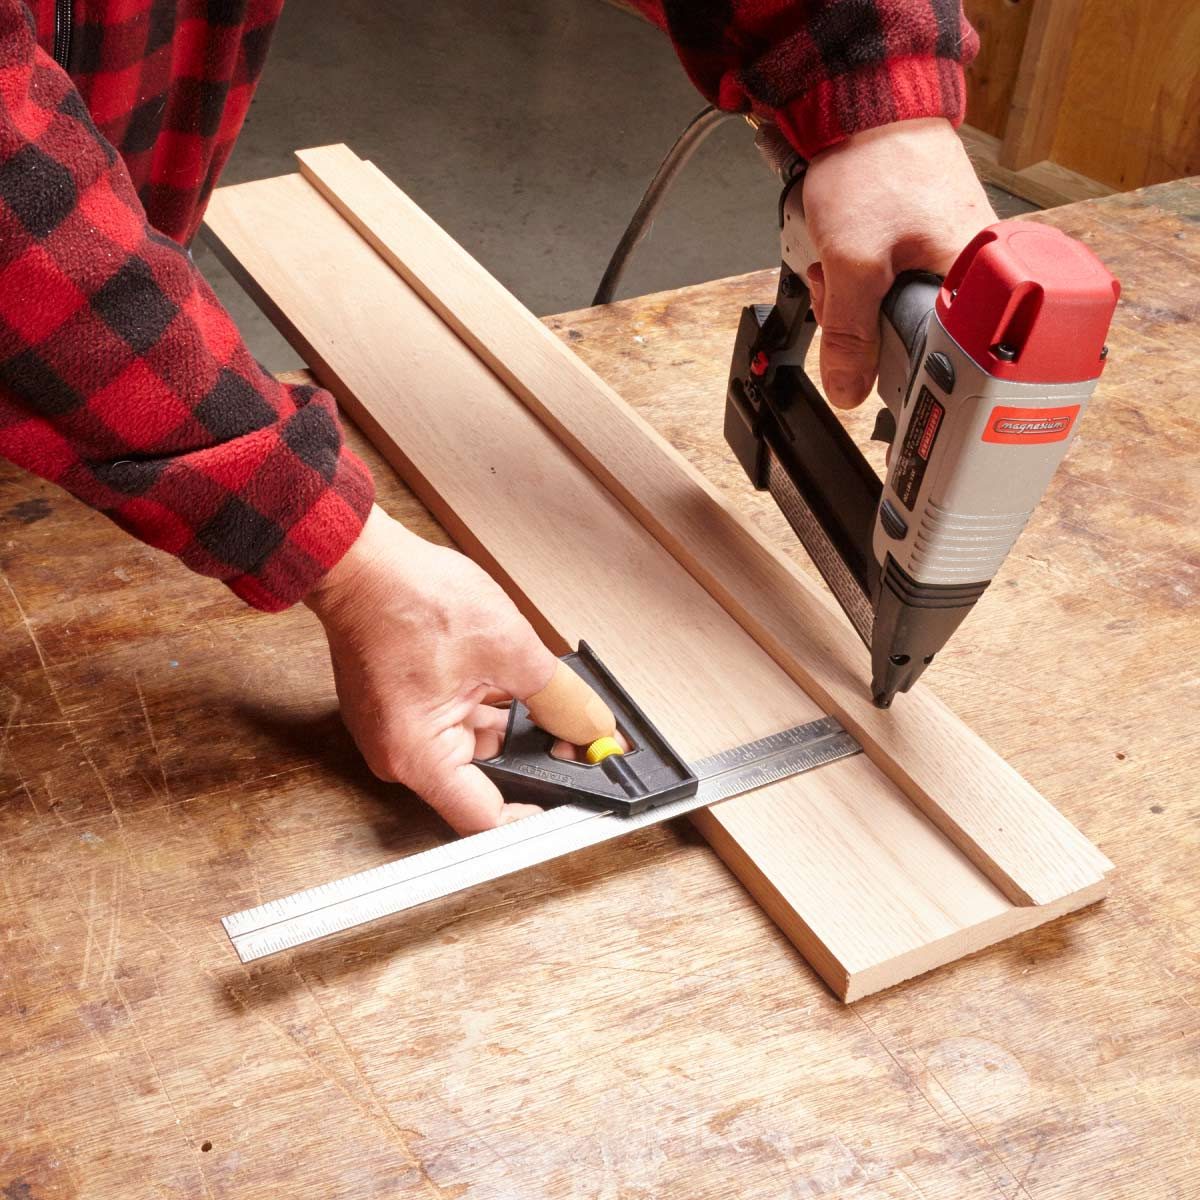
Tack trim for marking
Advertisement
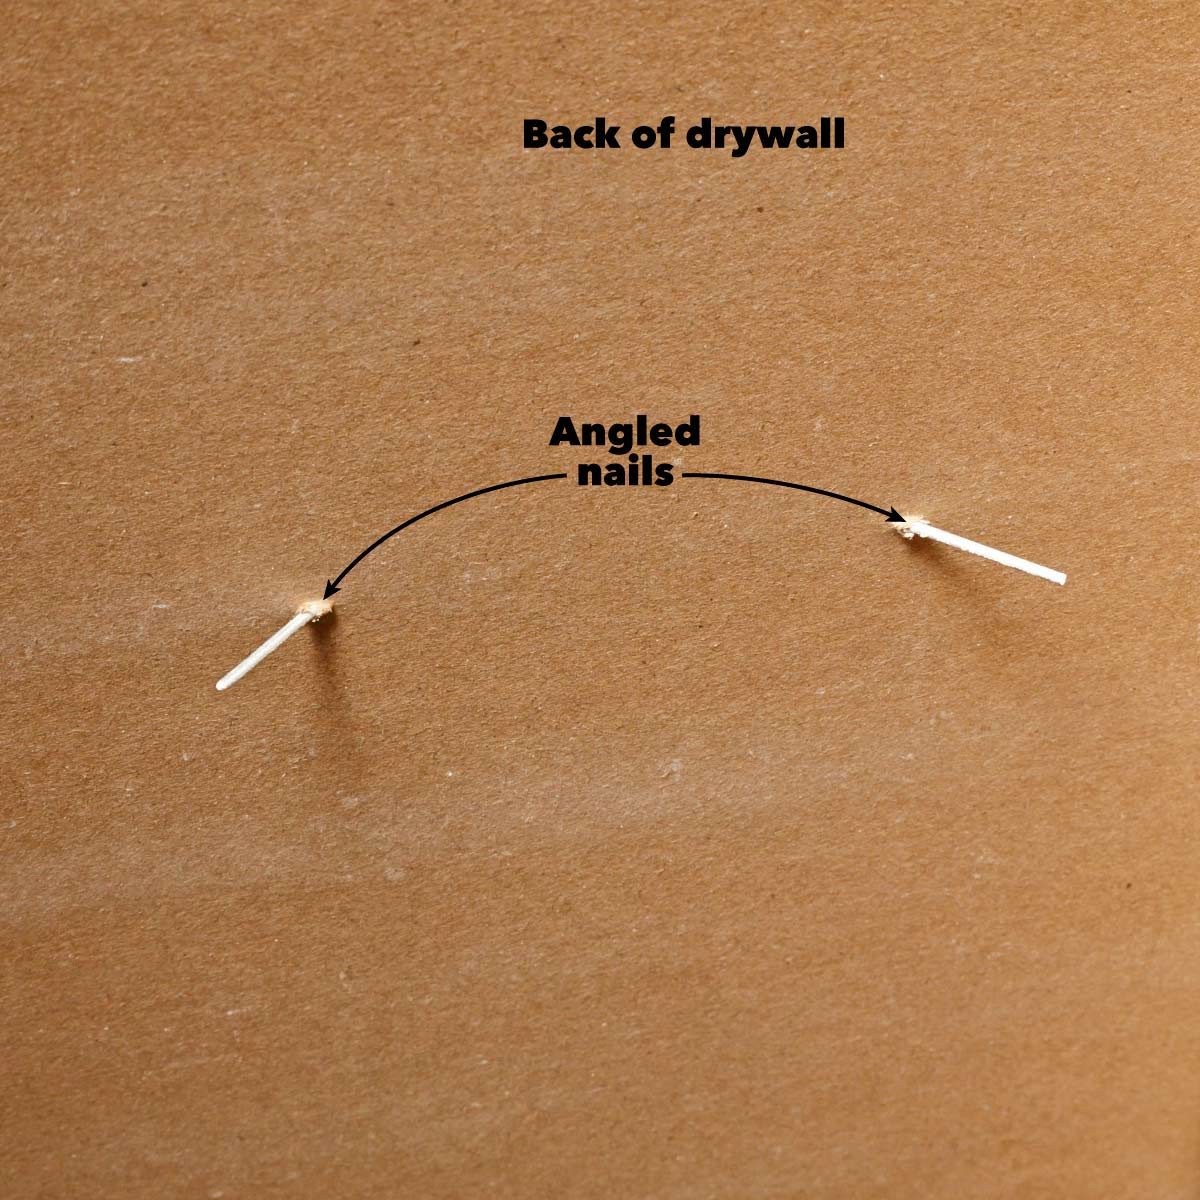
No stud? No problem
Studs aren’t always located where we need them. When I need to nail trim where there’s no stud, I dab some construction adhesive on the back of the trim and then drive nails into the drywall at 45-degree angles. That holds the trim tight against the wall while the adhesive cures. This “trap nailing” technique works fine with brad nailers and even better with finish nailers.
Extend your reach