Mastering Venetian plaster

Mastering Venetian plaster
FAMILY HANDYMAN

Venetian plaster, a beautiful and durable texture that mimics natural stone, is believed to date back to fourth-century Rome. Creating it is a skill that takes years to master; however, there’s room for artistic licence. Modern tools and materials put the technique within the grasp of a DIYer.

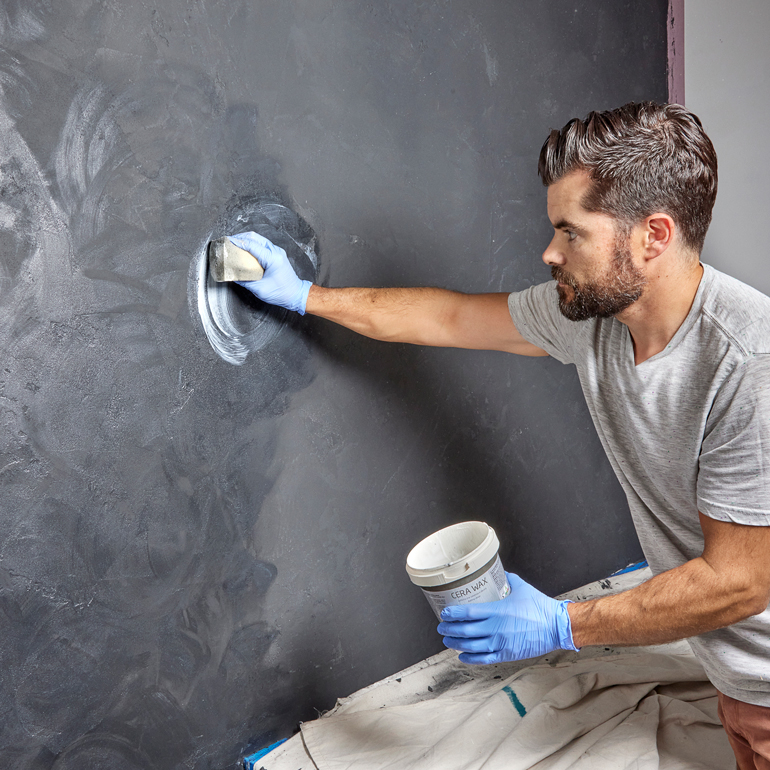
Venetian plaster is a great choice for a kitchen splashback. It may seem difficult to clean. But when the texture is burnished and sealed, cleaning it is no more difficult than cleaning grouted tile.

This was my first try at a plaster wall, and I’m not even very good at finishing plasterboard. But with a little practice, I felt confident enough to tackle it. After you read this, I hope you will too!

Tools Required

250mm taping knife

75mm taping knife

150mm taping knife

230mm paint roller

Basic hand tools

Drill/driver

Mud pan

Putty knife

Sponge

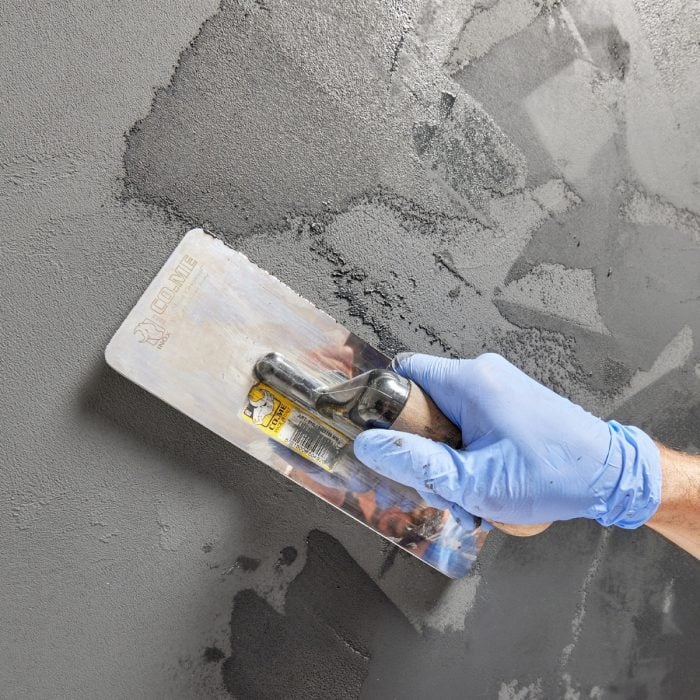
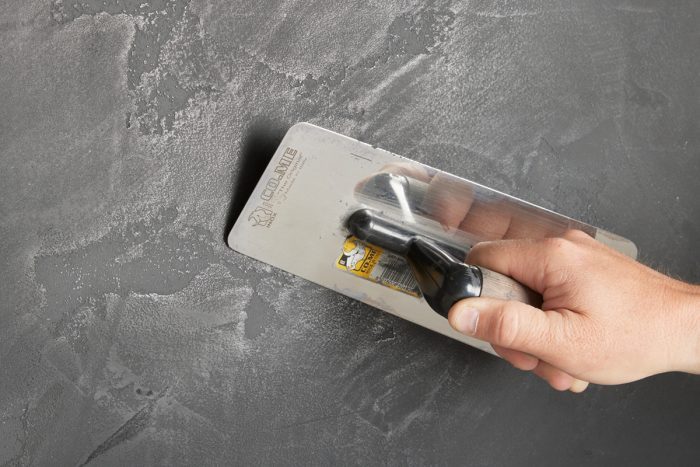
Venetian plaster trowel

About the Expert

Drew Beninati owns and operates the PlasterCenter in the US. He has been a plaster contractor for 40 years and has run his training centre for 20 years. Learn more at plastercenter.com.

Advertisement

Step 1: Remove cabinets

Step 1: Remove cabinets
FAMILY HANDYMAN

The kitchen wall we chose to plaster had a few cabinets we planned to replace with open shelving, so our first step was to tear them out. If you’re plastering a wall that holds cabinets you plan to keep, you can plaster right up to them.

Learn 20 tips on how to paint kitchen cabinets.

Step 2: Repair wall damage

Step 2: Repair wall damage
FAMILY HANDYMAN

It’s best to start a plastering job with a smooth wall. Removing the cabinets damaged our plasterboard in some areas.

While we were removing the glass tile splashback, chipping it away a tile at a time, we decided it was safer and easier to remove the splashback as a unit by cutting out the plasterboard it was attached to. Then we patched in the new plasterboard, smoothed it out with a few coats of joint compound and repaired all the dents with surfacing compound.

Check out our video on repairing holes, dents and scrapes in plasterboard.

Step 3: Prime the wall

Step 3: Prime the wall
FAMILY HANDYMAN

After sanding the repaired wall smooth, we sealed it with a special primer that has “tooth” to hold plaster, which is thicker and heavier than paint. Let the primer dry for three to four hours. For a similar product, try Dulux® Acratex® Venetian Plaster™ Quartz Primer.

Step 4: Trowel on the first coat

Step 4: Trowel on the first coat
FAMILY HANDYMAN

Apply the first coat evenly across the entire wall. Use a 3-in. taping or similar knife to scoop the plaster onto your trowel. Then start from one end and work your way across the wall, applying a thin coat, trowelling the plaster in different directions, then smoothing it out.

To avoid trowel marks in smoothed plaster, spread the plaster from the bare wall into your previous strokes. Use a good quality trowel for best results. If you’re going for lots of texture, make many small strokes; make longer strokes for larger smooth areas.

We visited a specialised retailer who mixed the exact colour we wanted, but some online retailers offer pre-mixed plaster.

Check out these painting tips professional painters don’t want you to know.

Step 5: Skip-trowel the second coat

Step 5: Skip-trowel the second coat
FAMILY HANDYMAN

The second coat is lighter than the first and meant to smooth out the ridges created by the first coat.

I started on the opposite side of the wall and worked my way across. I put plaster on my trowel, applied it to the wall and smoothed it out toward the previous strokes. I intentionally left some areas uncovered, letting the first coat show through in small patches.

Step 6: Burnish the plaster

Step 6: Burnish the plaster
FAMILY HANDYMAN

Before the second coat dried completely, I burnished the entire wall with a clean trowel. Starting on the same side of the wall as the second coat, I slid the trowel across the plaster, holding the trowel at an angle and using moderate pressure.

Burnishing closes the pores of the plaster, creating a smooth and more water-resistant surface. The technique also gives Venetian plaster its unique shine. Burnishing makes the texture created by the first coat come alive.

Step 7: Wax the plaster

Step 7: Wax the plaster
FAMILY HANDYMAN

After the second coat, wait 48 hours to let the plaster dry completely, then apply the protective wax. I used Cera Wax to brighten up the wall, protect it from moisture and make it soft to the touch.

I applied this liquid to the wall with a sponge in a circular motion. Apply two or three thin coats to complete the wall.

Sign up here to have Handyman’s favourite stories straight to your inbox.

Source: Family Handyman